
Every skier can face the disappointment of discovering damage to the base of their board. Knowing how to properly repair ski bases will extend the life of your gear and keep it performing. Whether you’re dealing with minor scratches or deep punctures, learning how to repair your skis yourself will save you trips to the shop. How do you repair a scratched ski base at home? What are the best ski base repair kits and when should you P-Tex your ski base or need more serious fixes?

Step-by-step guide to repairing a ski base
Minor damage doesn’t have to be a major problem. How do you handle a basic ski base repair like a pro?
Start by thoroughly cleaning the damaged area. Any dirt, wax, or moisture will weaken the repair. A plastic scraper and base cleaner are good prep tools. Light scratches may only require wax, but deeper ones may require P-Tex.
To fill in gouges, light a P-Tex candle and let it drip into the groove. Keep the flame close, but don’t let it drip. Pour a little, then scrape off the product when it cools. A final coat of wax will finish the job.
When repairing a scratched ski base at home, patience is more important than speed. Rushing will result in a repair that won’t last.
Tools you’ll need:
- A candle or P-Tex stick.
- A lighter or blow torch.
- A metal scraper.
- Base cleaner.
- Wax iron.
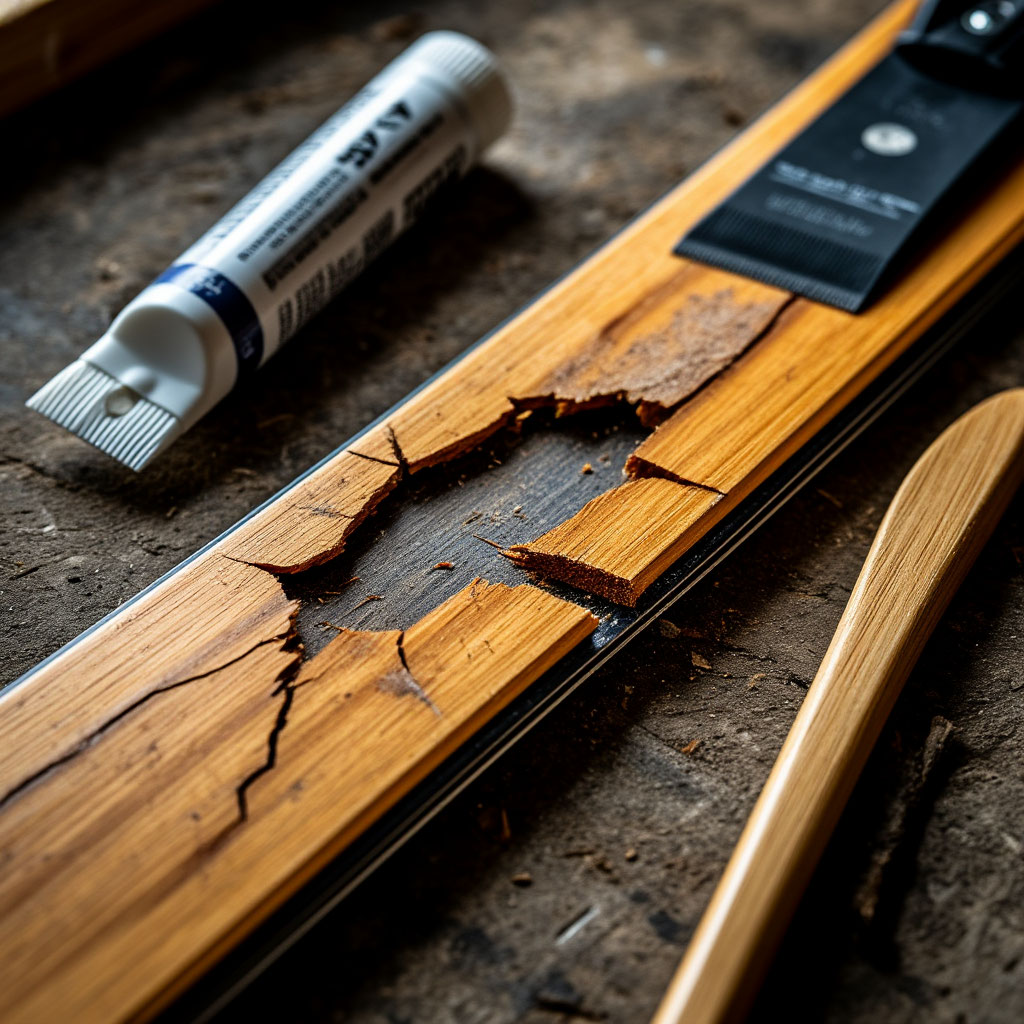
How to Fix Deep Scratches and Core Shots
Deep scratches in the core require special attention. Unlike surface problems, they expose the core of the board to moisture. If left untreated, they will cause delamination and permanent damage.
First, dry the damaged area completely. A hair dryer will help remove trapped moisture. For core punctures, P-Tex alone won’t do the trick. You need a stronger epoxy bond. Mix up some two-part marine glue and pack it tightly into the hole. Overfill a little as it shrinks as it cures.
Let the epoxy cure overnight. The next morning, sand it smooth with 120-grit sandpaper. Then use 220-grit for a smooth finish. Apply P-Tex over the top for a seamless finish. This two-coat approach prevents future water damage.
For larger tears, consider welding the core. This permanently fuses new material, but requires professional tools. Most riders use epoxy resin for home repairs.
| Damage Type | Solution | Key Tools |
| Deep gouges | P-Tex fill + wax | Candle, scraper |
| Core exposure | Epoxy + P-Tex | Adhesive, sandpaper |
| Large tears | Base welding | Welding gun, patches |
The right fix depends on severity. Small marks just need P-Tex. Structural damage demands epoxy. Serious tears might require pro help. Always finish with wax to protect your work.
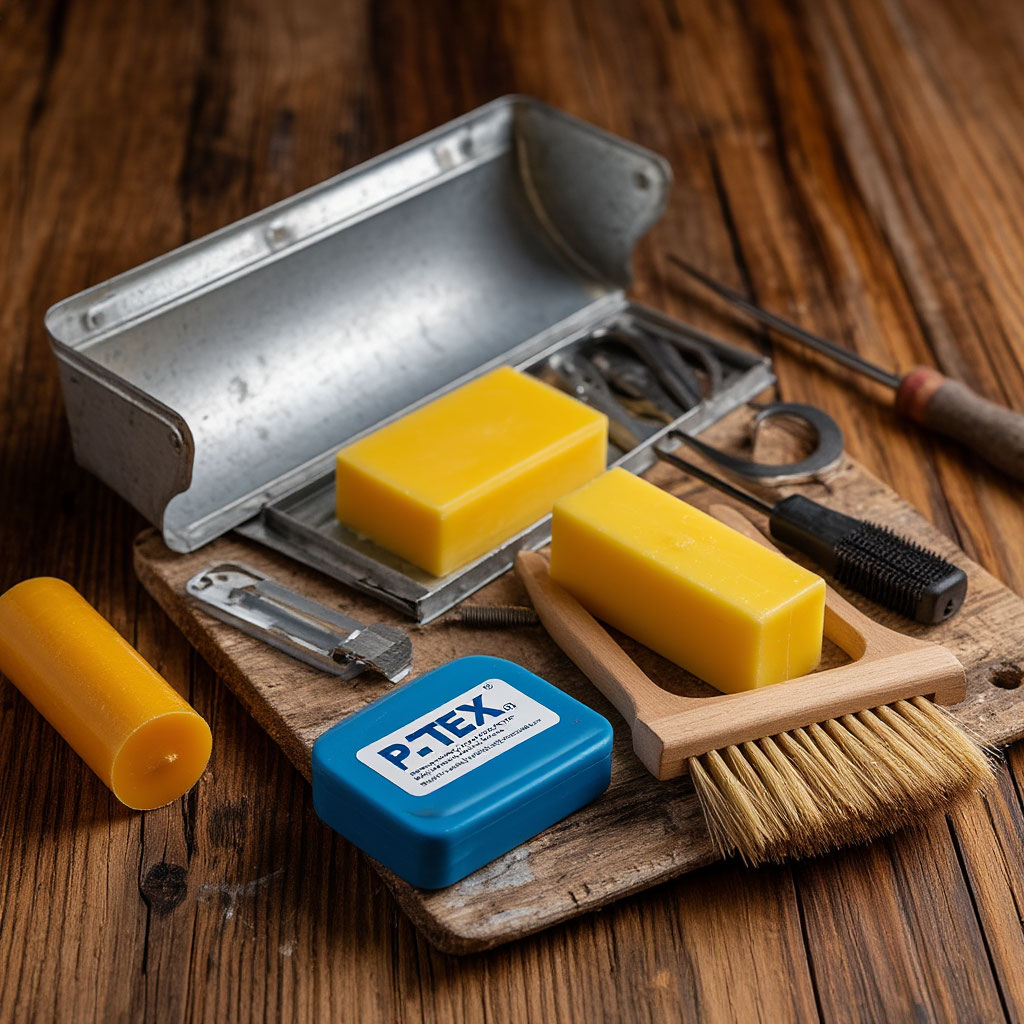
The Best Tools for At-Home Ski Repairs
Every DIY ski repair guide starts with P-Tex. Candles are great for small jobs. Sticks in a gun handle deep cuts. Keep both on hand when learning how to repair ski base damage. A butane lighter melts them cleanly, without smoke.
Scraping tools you need:
- Metal scrapers smooth out fresh P-Tex perfectly.
- Plastic ones remove excess wax without scratching.
- A razor blade handles tough-to-remove ridges.
All are essential for a smooth repair of a scratched ski base at home.
Cleaning and prep materials
Base cleaner loosens dirt before repair. A nylon brush scrubs dirt out of grooves. Isopropyl alcohol works in a pinch. Never skip cleaning. It extends the life of any ski base repair.
Epoxy for Serious Damage
Two-part epoxy seals cores better than P-Tex alone. Mix it thickly and press it deep into the holes. Sand it after it cures. This trick should be in every best ski base repair kit.
Preparing to Apply Wax for the Finishing Touches
An old clothes iron will melt the wax evenly. All-temperature wax is suitable for most conditions. A horsehair brush will then polish the base. Proper waxing completes any P-Tex job on a ski base.
Storage and Extras
A tackle box will keep your gear organized. Sandpaper (100-400 grit) will smooth out rough areas. Gloves will protect your hands from the hot P-Tex. With these tools, DIY ski repair is easy.

When to Use P-Tex vs. Base Welding
Choosing between a P-Tex candle and a welder depends on the damage. If you’re learning how to repair ski base problems, this choice is important. Small scratches and shallow grooves? P-Tex is your friend. It’s the easiest way to fix a scratched ski base at home without complicated tools. Just melt, drip, and scrape. But if you’re looking at a gaping hole or torn edges, that’s welding territory.
P-Tex is great for surface-level stuff. Most DIY ski repair jobs won’t require much more than that. The best ski base repair kits usually include P-Tex sticks because they handle 90% of common damage. Fast, cheap, and effective. Great for keeping your board running smoothly.
Welding a base is for when things get ugly. Cores, deep cuts, or delaminated areas require serious attention. Welding bonds new material directly to the base, creating a permanent patch. It’s stronger than P-Tex, but it requires more skill. If you’ve never done it before, practice on an old pair first. Still not sure? Check the depth. Can you see the core? Welding. Just a scratch on the surface? How to apply P-Tex to a ski base is all you need. Matching the right method to the problem makes for a strong, long-lasting repair. No need to overcomplicate it. Start simple and work your way up as needed.
Taking care of your gear means you can spend more time on the slopes and less time in the shop. Now that you know how to troubleshoot your ski base, nothing can slow you down. Keep the right tools on hand, take your time, and you’ll be able to enjoy the snowy slopes.
Tags: Guide, Snowboard